Importing From RVParky
Exporting your trip from RVParky
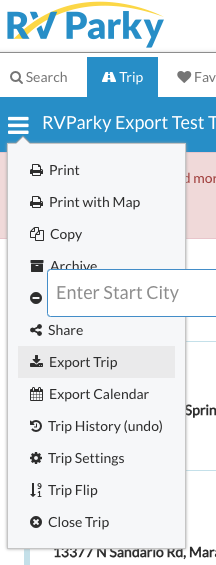
Navigate to the rvparky website and open the trip you would like to export. Click the menu in the upper right hand corner and choose export
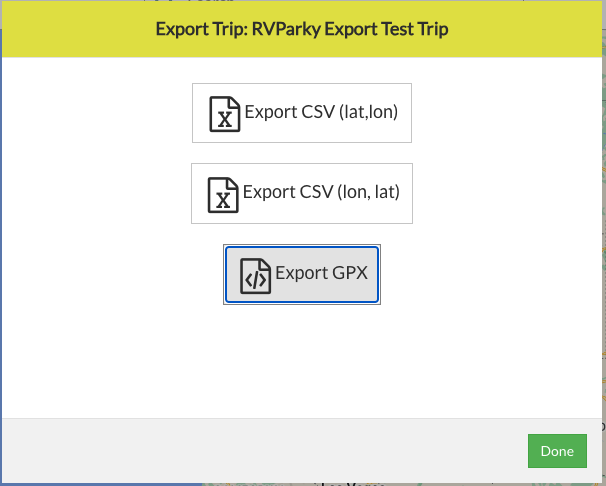
This will cause a pop-up to appear where you choose which type of file to download. Choose ‘Export GPX’ and save the file.
Once the file has been downloaded, return to the Arvee application.
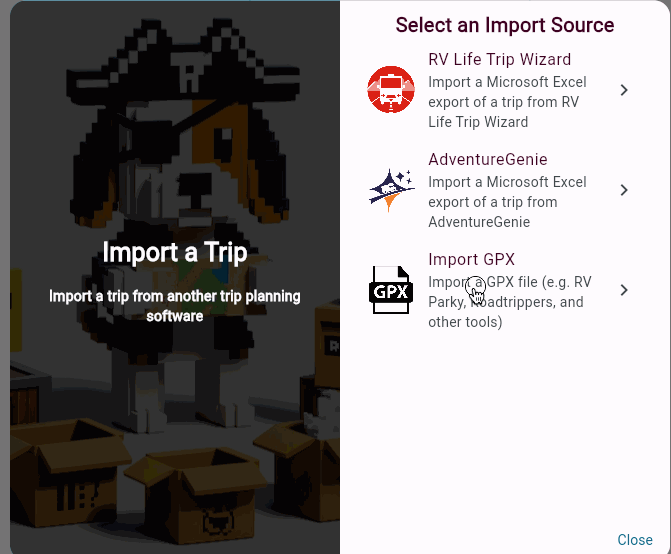
Importing your trip into Arvee
With the export completed, you are now ready to import your trip into Arvee.
Option 1: Import from the Create Trip Screen
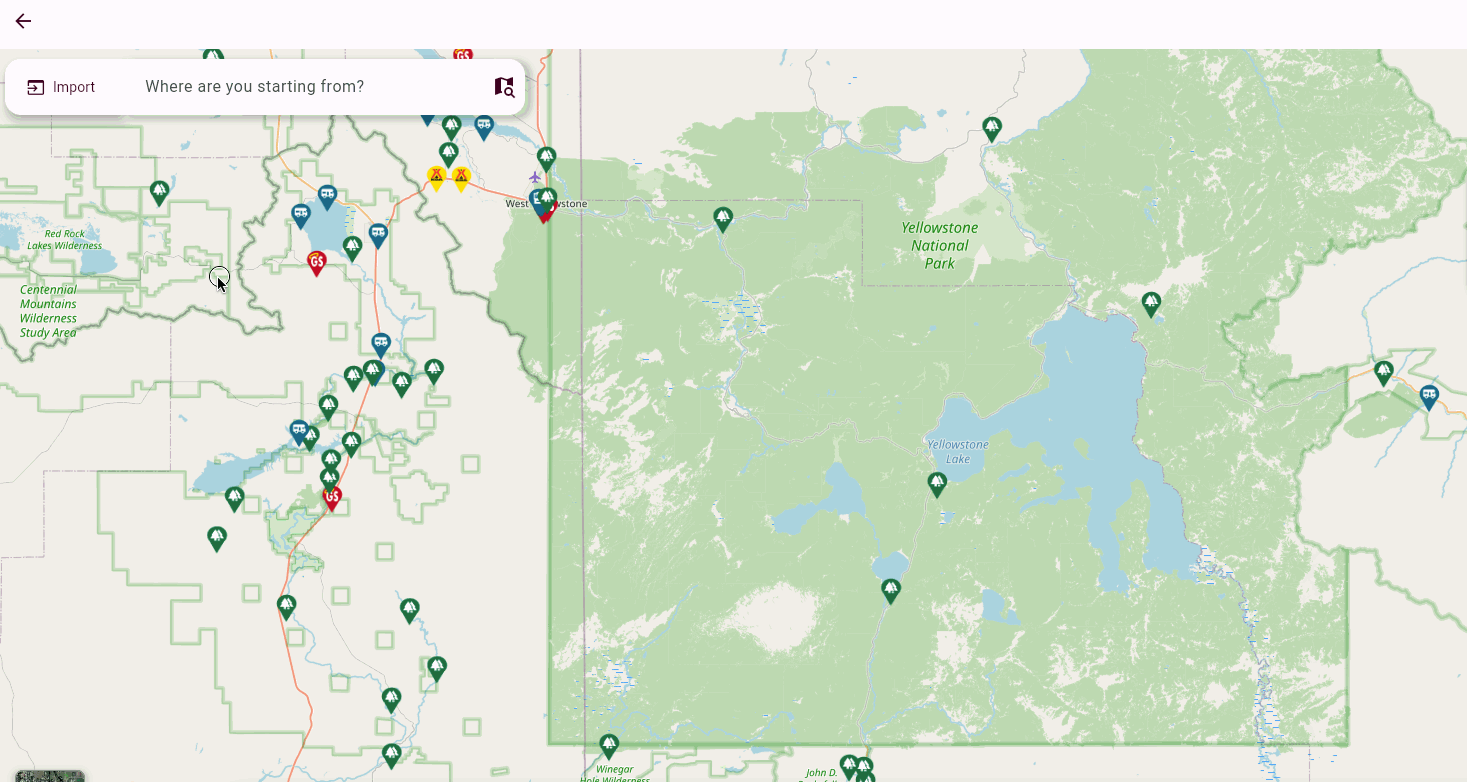
If you haven’t created a trip in Arvee yet, then by default you can import your trip from the create trip screen by clicking the “Import” button next to the search bar:
Option 2: Import from the Dashboard
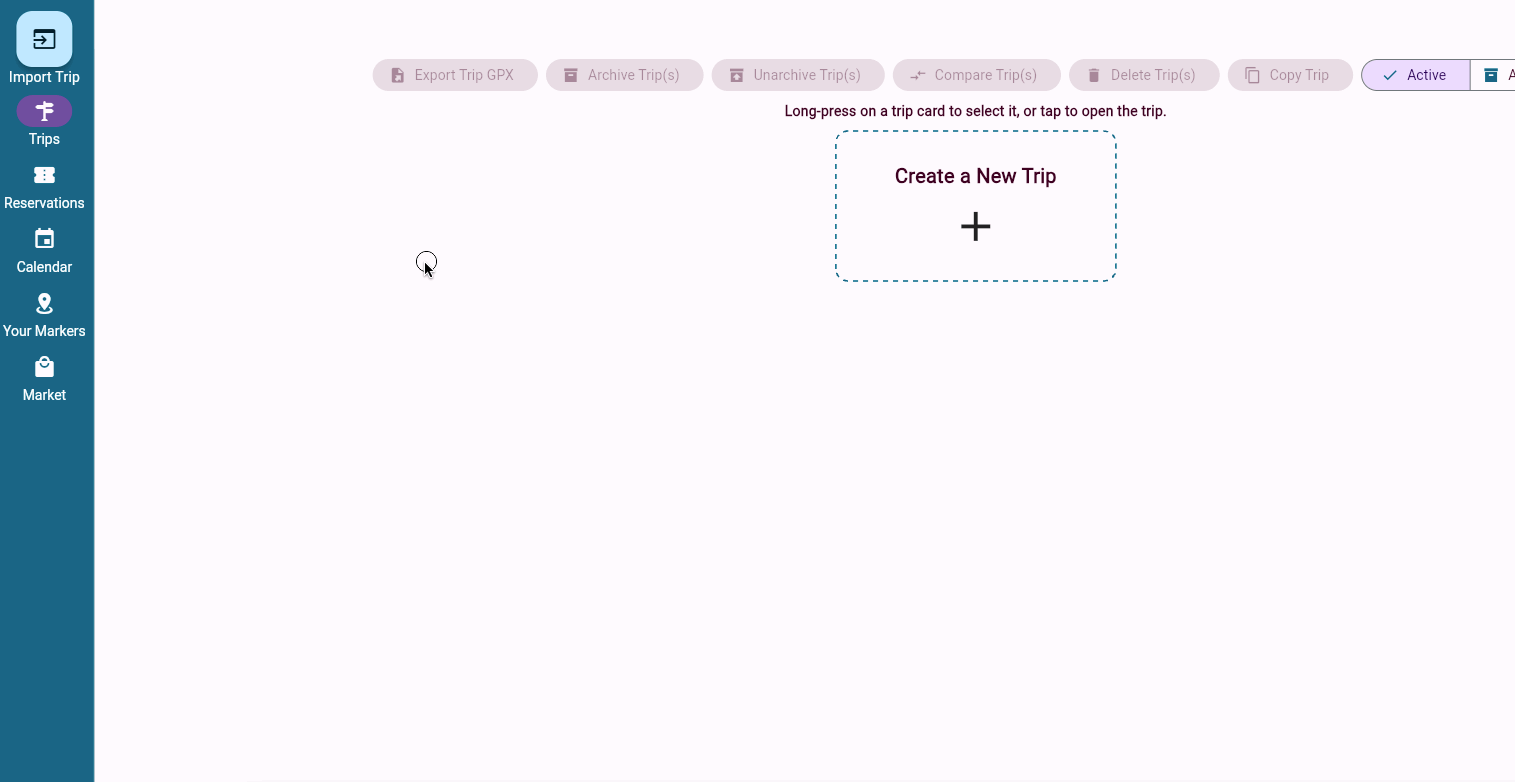
If you have already created at least one trip by default you will be presented with the Arvee dashboard. From here, click the “Import Trip” button to open the import dialog:
Importing an RVParky GPX file
Once in the Import dialog simply choose “Import GPX” to import your RV Parky export. This will begin the import process.
Once the import has been completed you will automatically be taken to your trip to continue your planning.